Sunday, August 26, 2007

Teaching Your Child How to Embroider

Teaching your child how to embroider could be a gift that they treasure for the rest of their lives. It's a skill that could continue to bring them hours of enjoyment or it could even lead to a future career path.

A recent blog by Melissa at Hand Embroidery Group Projects proves it's never too early to teach your child how to embroider. She shares with us her idea and shows us step by step how she had her toddler using an embroidery hoop, a peg and a ribbon to sew on a piece of denim fabric.
The process reminded me of my many efforts to teach all three of my children how to embroider. From as early as 3-4 years old they were sewing on pieces of cardboard that I had drawn a basic design on. I then pieced small evenly spaced holes along the design using a skewer or large darning needle. They would then use wool (it doesn't tangle as much) and a blunt tapestry or darning needle to sew along the line. They loved this activity and would add buttons and other bits of sequence to decorate it even more. All of my children still have their first "works of art" amongst their special things which proves how special learning how to embroider was to them. Here's Katie's first attempt:

Once they have mastered this technique it is easy to introduce them to sewing onto fabric such as calico or felt. They can start to use a finer thread and experiment with different threads. I always found it much easier to use a small embroidery hoop. This kept the fabric taut and made the stitches easier to work. From learning just a few simple stitches they could produce wonderful keep sakes. You could draw your own designs for them to sew or you could use simple shapes or pictures from colouring in books. The other alternative is to introduce them to a simple pattern or a sewing kit designed especially for kids.
Before too long your child could be creating wonderful embroidered keepsakes. I remember one year my eldest daughter embroidered Christmas tags for each family member and proudly place them on the table as part of the table decorations.
It's important to remember that your child's first attempt at how to embroider may not be perfect but chances are they will remember and treasure the experience for years to come.
Click here to view Melissa's blog about teaching her toddler how to sew.

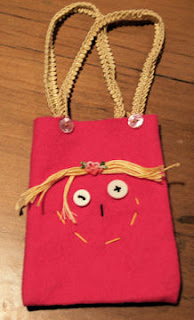
Here are some other examples of my kid's first sewing attempts.
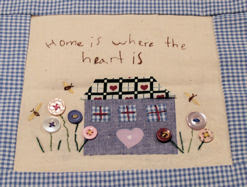


The little house shown above has incorporated some fabrics. These can be secured with fusible webbing or fabric glue. Buttons always add some more interest and the kids love searching through the button jar for the right button to add to their design.
Have fun with the kids.

Happy embroidering!
Warmly Lenna
www.stitchingcow.com

Tuesday, August 14, 2007

Embroidered Bag Featured in Homespun Magazine


I always enjoy clicking through Homespun magazine and discovering all the lovely projects on offer. Although this month I was extra excited to receive my copy because I have a feature article and project in the August edition. It's a small bag decorated with two hand embroidered, patchwork pockets. Ideal for storing all those sewing bits and pieces. Here's a picture of what it looks like:


As you can see it includes a matching angel to hold your embroidery scissors so that they will always be close at hand.
I was also pleased to see that Homespun has included a special on making items for a fete. Something I have been very busy doing over the last couple of weeks. So I was very glad to have some new ideas to work with. Fellow designers and friends Rosalie Quinlan and Leanne Beasley have both made some cute little projects that I'm sure will tempt many buyers on the day. Thanks ladies. I have already made up 10 of the little angels and hope to start on the hearts soon (when I find some spare time!).

Happy sewing!
Warmly Lenna
www.stitchingcow.com

PS I'll post some pictures soon of the craft items I have made for the school fete just in case you have a fete coming up soon as well

Sunday, August 12, 2007

Look After Your Sewing Machine

How does your sewing machine look at the moment?
If you were to get it out and look at it closely what would you see?
Let me guess. Is it dusty? Is your needle worn? Can you even remember the last time that you replaced the needle? Do you have lint and fluff built up around the bobbin area?
Don't worry you're not alone. I'm the first to admit that I don't take very good care of my sewing machine. After reading an article about sewing machine maintenance by Sally Hickerson I realized that my trusted companion could really do with some cleaning and maintenance.
Sally outlines some basic guidelines for sewing machine maintenance:
1 - Keep it covered
2- Change the needle often
3- Wind bobbin correctly
4 - Clean regularly
Whoops I'm guilty on all four accounts. How do you rate? In fact I think I had better go right now and follow her suggestions. Click here if you would like to read about how to look after your sewing machine a bit better. It may last for years and years to come if you do.
Until next time.
Warmly Lenna
www.stitchingcow.com
Tuesday, August 7, 2007

Doll House Patchwork Quilt


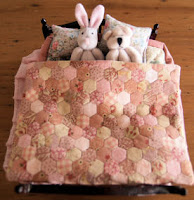
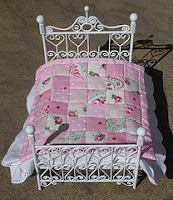
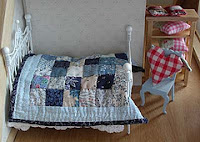
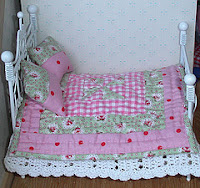
My daughters and I have enjoyed hours of fun decorating their doll's house. It has been a work in progress for the past 10 years. Just recently I came across some 1/4" hexagon pre cut cardboard templates and I knew straight away that I had to have them. I knew they would make an ideal quilt for the doll's house bed. My youngest daughter carefully selected the colours and I started sewing the tiny hexagons together. She was thrilled as she admired the progress each night. At first I found the little shaped pieces a bit tedious to hand sew together until I increased the seam allowance. Then the process was fun. I've included a picture of the end result for you. I also came across some other doll house quilts on flickr and have shared them here as well. I think my next project should be a needle punched floor mat. I'll let you know how it progresses.
Until next time. Happy patchworking!
Lenna
www.stitchingcow.com

Here's a close up of the hexagons and some other designs by Judy Scott as shown on flickr


Fun with needle felting


Recently I attended a craft fair and was intrigued as I watched a felt artist stab away at a bundle of wool. She was working on a doll in the shape of an old woman. The detail that she was able to achieve was incredible. I remember falling in love with a Santa that she had on display and vowed that I must give this needle felting thing a try. So as July approached I decided that this year's Christmas in July project should be my very own felted Santa. I purchased some wool and a felting needle and made a start one night amongst my sewing group friends. They laughed as they watched me. Teasing that I looked like I was practicing voodoo as I stabbed away at my Santa. But I persisted and within an hour my very own Santa emerged. I have included a photo of him for you.
The process is very simple although I did manage to stab myself quite regularly.
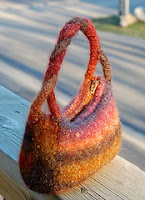
I have included some other photos of felted projects from flickr in the hope that I can inspire you to try this technique. There's everything from felted purse pictures to felted birds.
Here are two links that demonstrate the process involved:
I also came across some videos on youtube that show how the needle felting process. Just go to www.youtube .com and search for felting.
Until next time, happy felting!
Lenna


ShareThis

LinkWithin

Related Posts with Thumbnails